The DATEDIF Function in Apple Numbers Explained

Find the difference between two dates with options to ignore certain aspects of the date such as the day, month, or year
If you want to figure out the time difference between two dates, using the DATEDIF function in Apple Numbers can help make that easy. Yet, the function itself can be a bit confusing. With DATEDIF, you’ll be able to precisely calculate how many years, months, or days there are between any two dates. Here, I’ll explain how to use the DATEDIF function in Apple Numbers, but I'll also demonstrate why you may not need to use this function at all.
Things to Know
- This function will calculate the precise number of days, months, or years between two dates.
- Some 'Calc-Method' options are confusing (i.e. MD, YM, YD), but they do have their specific purpose.
- Alternatively, you could simply subtracts dates from one another and bypass the need for the DATEDIF function altogether.
What is the DATEDIF Function in Apple Numbers and Why Does it Matter?
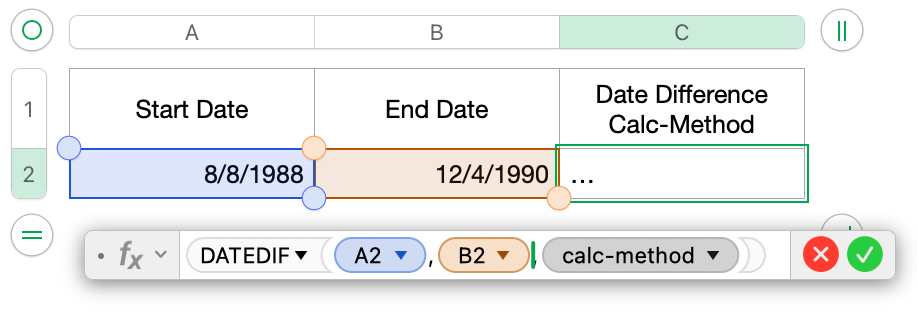
The DATEDIF function (pronounced "date dif") returns the number of days, months, or years between two dates. As shown in the screenshot below, this function will ask you for the following arguments in this specific order:
- Start-Date
- End-Date
- Calc-Method

The DATEDIF function is helpful in cases where:
- You need to calculate the duration of how many either years, months, or days between two dates.
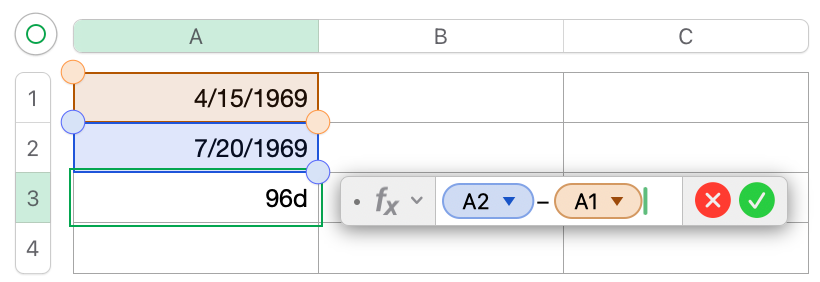
With that said, know that this function is not the only way to calculate a duration. You can actually calculate the difference between two dates without using a function at all. In the screenshot below, I have two dates. By subtracting a date from another date, the spreadsheet will actually calculate what the difference is. In this example, it gives us the result and, by default, provides the result in days. You may also calculate both a positive duration, i.e. 200d (how many days until), or negative durations, i.e. -200d (how many days have past).
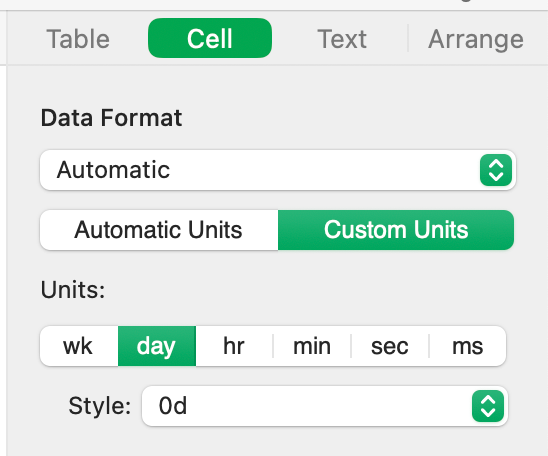
Additionally, the DATEDIF function in Apple Numbers will let you further define the duration. You can define by weeks only, weeks and days only, days, hours, and minutes only, seconds only, etc. While you can define by any one of these choices or pick a mix of them, you have to make sure your choices are consecutive.
For example, while you can choose to show in week and day as shown in the example below, you cannot choose week, day, and minutes. If you did, Apple Numbers would also force the choice of hours in order to also show minutes. The same goes the other way around. You can choose millisecond and sec, but you couldn’t also choose day without Apple Numbers also forcing to view of minutes and hours. The choice in units must be consecutive.
You may noticed that there is no year option. Whether using this method or the DATEDIF function, you are not able to show the duration in years. As semi-workaround this is to label the cell next to it or underneath it and type in “years”. You could also create a custom data format, but this article does not dive in how to do that. Lastly, there is a function to calculate the year to a decimal (YEARFRAC), but we also do not discuss this within the post.
How to Use the DATEDIF Function in Apple Numbers: Conceptual Example
Step 1: Enter the Start-Date (should be a reference from another cell)
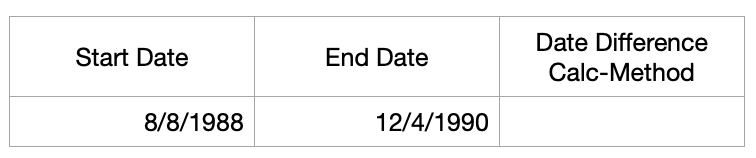
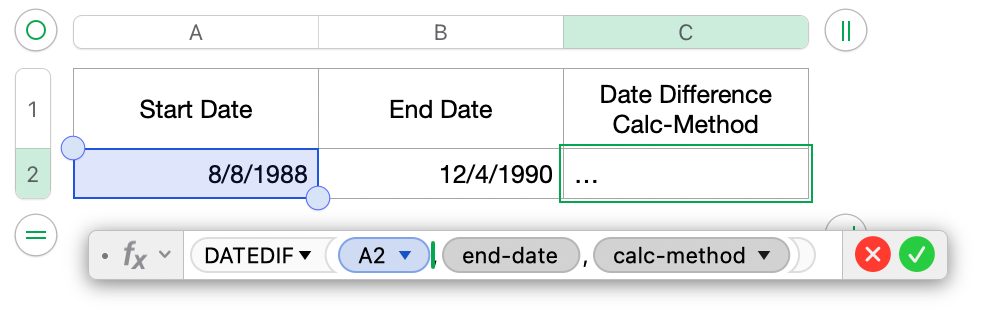
The first argument of the function is to select the start-date. In our example, the start-date is in cell A2, so this should be the cell you select.
Step 2: Enter the End-Date (should be a reference from another cell and must be a date higher than you Start-Date)
The second argument of the function is to selected the end-date. In our example, the end-date is in cell B2, so this should be the cell you select. NOTE: The end-date must be a “higher” date than the date you used for the start-date. Essentially, that means your end date needs to be in the future compared to your start date, i.e. start-date = 2/2/1902, end-date = 9/9/1909, etc.
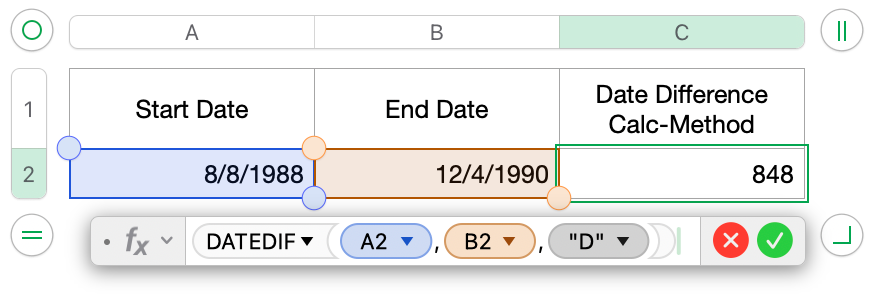
Step 3: Enter the Calc-Method (must specify 1 choice from a list of 6 pre-defined options)
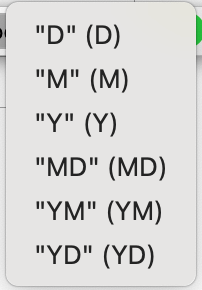
The third and last argument of the function is to select the calc-method. You must choose from a drop down (or type manually) one of six pre-defined choices. These choices are:
- D = Returns the number of days between the start and end dates
- M = Returns the number of months between the start and end dates
- Y = Returns the number of years between the start and end dates
- MD = Returns the days between the start and end dates, but ignores months and years.
- In other words, it takes the difference between days only. Doesn't matter the month or year.
- YM = Returns the number of whole months, but ignores the year.
- In other words, the difference between months only. Doesn't matter the days or years.
- YD = Returns the days between the start and end dates, but ignores the years.
- In other words, it counts days and months, but the values the spreadsheet returns is in days. It ignores years.
The first three options (D, M, and Y) are pretty straightforward. However, the last three options, MD, YM, and YD are slightly confusing. Here is any easier way to interpret these last three.
- The year is always ignored in the calculation.
- Look at the last letter for a clue, i.e. "D" for days, "M" for months
- For the differences between "MD" and "YD", think of it this way:
- M within the MD for days within the month, hence the "M"
- Y within the YD for days within the year, hence the "Y"
I admit, I don't always remember what the difference between these ones. However, a quick refresher with my number list above helps.
Step 4: The Results
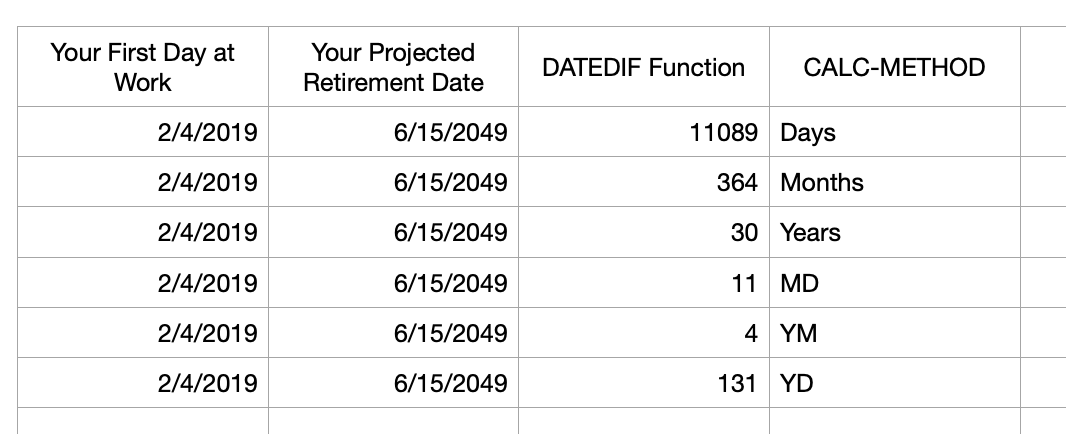
The results of our inputs gives us the following, depending on which calc-method was used. Notice in column C, the output given is in whole numbers and cannot be extended to any decimals, i.e. 364.5 months or 30.1 years.
The results in cells C2, C3, and C4 are easy to understand. Those are how many days, months, and years are left based on the date calculation. The last three in cells C5, C6, and C7 are a little tricky to understand, so let’s briefly break it down.
In cell C5, we’re calculating based on the MD calc-method. Essentially, you’re calculating the days between the start and end dates while ignoring whatever the months and years difference is. In our example below, the difference between 4 and 15 is 11 days. Our calculated spreadsheet results show the same. It didn’t matter what the month is or the year is. If we wanted to included the month and year, that calculation is shown in cell C2.
In cell C6, we’re calculating based on the YM calc-method. Essentially, you’re calculating the number of whole months, while ignoring the year. In our example below, the difference between 2 and 6 is 4 month given that our start-date of 2/4 is not a whole month. The calculation would start with March. The difference between March and June is 4 months. Notice that even through June is not a whole month, it is still counted. That is because the whole month only applies to the start-date. Our calculated spreadsheet results show the same. It didn’t matter what the year is. If we wanted to included the year in terms of total months, that calculation is shown in cell C3.
In cell C7, we’re calculating based on the YD calc-method. Essentially, you’re calculating the number of days, while ignoring only the year. In our example below, the difference between 2/4 and 6/15 is 131 days. Our calculated spreadsheet results show the same. It didn’t matter what the year is. If we wanted to included the year in terms of total days, that calculation is shown in cell C2.
Tips and Reminders for the DATEDIF Function
Some tips and reminders to remember when using the DATEDIF function in Apple Numbers:
- Output is given in whole numbers and cannot be extended to decimals
- Argument 1 (start-date) cannot be “higher” than Argument 2. That is to say your start-date cannot be in the future compared to your end-date.
- Can always calculate the difference between two dates without a formula, based on what you’re trying to accomplish
Conclusion and Final Thoughts
The DATEDIF function is a good way to calculate the difference between two dates. While you don’t have to use a function to accomplish this, the DATEDIF will provide more options if you need them. You can even perform multiple DATEDIF functions in a single formula to show a years, months, and days if you desire.
For more information on this specific function, visit the Apple Support guide for DATEDIF.
Similar Functions That May Help:
- DAYS360
- NETWORKDAYS
- YEARFRAC

Member discussion