The DATE Function in Apple Numbers Explained
The Gist
Sometimes your data has a single column for the month, another column for day, and yet another column for year. If you need to combine these into a single date entry, you can do that with the DATE function. Another reason to use the DATE function is for consistent date interpretation regarding of a person's Language & Region settings. Note that it's unnecessary to use this function if you're simply typing in dates. Just type the date as a string (for example 7/20/1969) and Numbers will recognize and format the entry as a date. In this post, I'll explain what you need to know about the DATE function and how to use it in Numbers.
What It Does
- Using the DATE function to enter a date in a spreadsheet is unnecessary. Save yourself some time by entering a date as a string. Numbers will automatically recognize the format as a date.
- While there are one-off reasons, the primary reason for the DATE function is to ensure a date interpretation is consistent. This is regardless to the date format set in your Language & Region settings.
- If nothing else, the DATE function makes it easier to concatenate a date if you have these values in separate, individual cells.
DATE Function Details

Purpose: Combines entries from separate cells into a single cell in which date/time value format
Result: A date/time value such as 1/1/2025
Arguments: year, month, day
- year: the year value for your date
- A full, four-digit year should be entered. Otherwise, if you enter 25, this means the year is actually 25 and not 1925 or 2025.
- month: the month value for your date
- The value of 1 through 12 should be entered.
- day: the day value for your date
- The value of 1 through the correct number of days for the month specified, i.e., 1 through 28, 29, 30, or 31.
How to Use the DATE Function in Numbers
Why Does the DATE Function Matter?
The DATE function is helpful in cases where:
- Date records are split into different cells and combining them into a single cell is what you need.
- When you need to make sure the date is interpreted by the spreadsheet in a constant manner, regardless of your Language & Region settings on your computer.
With all that said, know this. The DATE function isn’t something you would use unless you actually needed to. Generally speaking, you typically type a date directly into the spreadsheet in whatever format you want, i.e. with dashes, with forward slashes, or however else you prefer. You simply don’t want to use this function to enter dates if the viable alternative is to type them directly into the spreadsheet as a string.
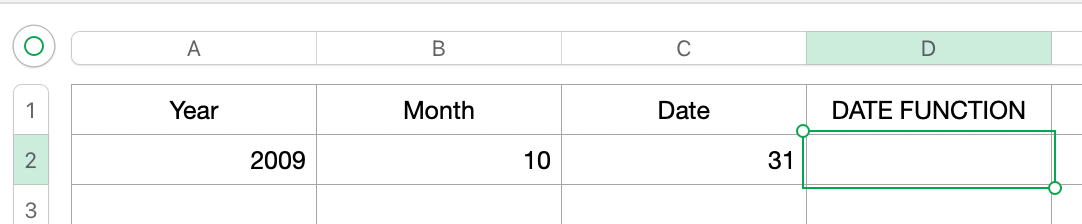
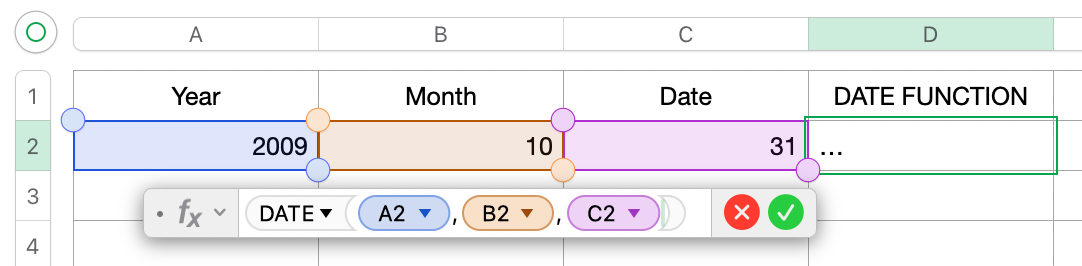
The below screenshot will be our conceptual example. We are going to create a date by combining the year, month, and day from three separate cells into one cell.
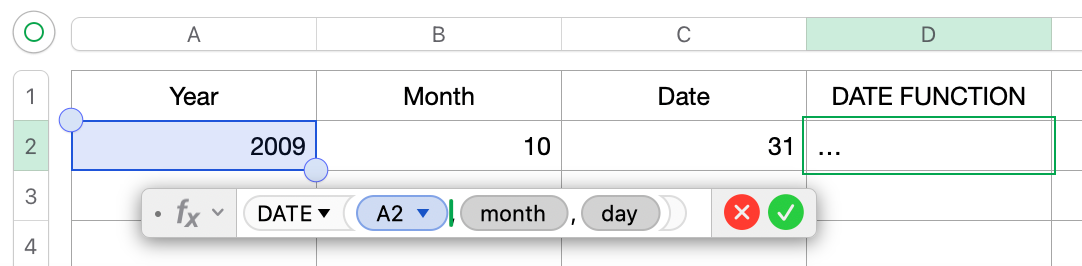
Step 1: Enter the Year (should be a reference from another cell)
The first argument of the function is to select the year. In our example, the year is in cell A2, so this should be the cell you select.
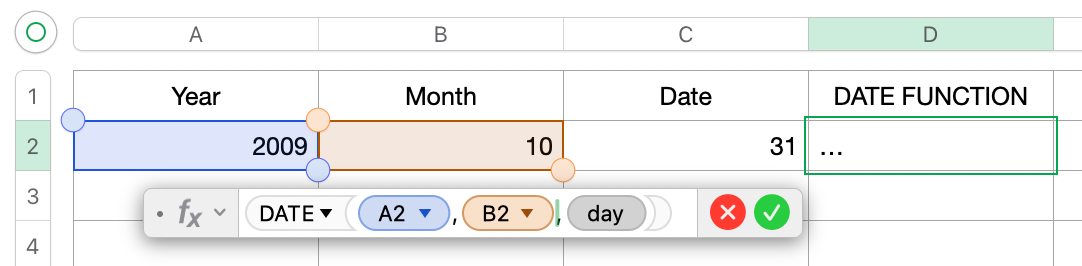
Step 2: Enter the Month (should be a reference from another cell)
The second argument of the function is to select the month. In our example, the month is in cell B2, so this should be the cell you select.
Step 3: Enter the Day (should be a reference from another cell)
The third and last argument of the function is to select the day. In our example, the day is in cell C2, so this should be the cell you select.
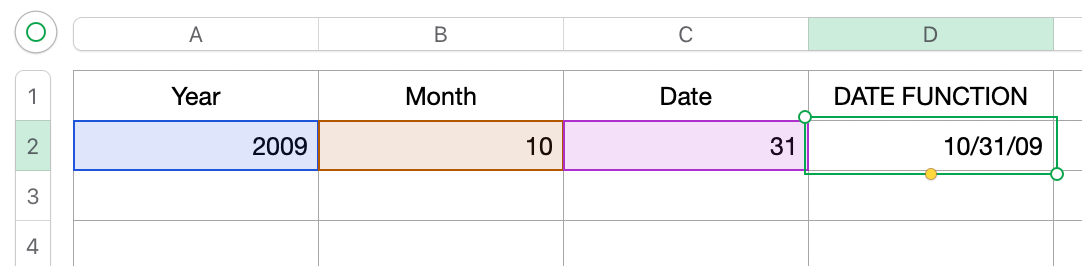
Step 4: The Results
The result of our inputs gives us “10/31/09”. In our example, the date format is automatic to our Language & Region settings.
Tips and Reminders for the DATE Function in Apple Numbers
Some tips and reminders to remember when using the DATE function in Apple Numbers:
- All arguments must be number values.
- The numeric values you enter for each argument should be as follows:
- Year = the actual year you need. Apple Numbers will not convert a year, i.e., 15 will be the year 15 and not 1915 or 2015. Be careful while using this if converting the spreadsheet to an Excel format. Excel cannot interpret dates before 1904 and you’ll see an error on the Excel spreadsheet.
- Month = should be between 1 - 12. Otherwise, any number higher than 12 will actually add to the entire date. An example is a date of 2023/13/01 that's interpreted by the spreadsheet as 2024/01/01. The date increases by 1 month (13 minus 12) as there are only 12 months in a year.
- Day = should be a number inclusive of the days for that particular month, i.e., 2023/01/33 will be interpreted and shown by the spreadsheet as 2023/02/02. The date increases by 2 days since January has 31 days (33 minus 31).
Conclusion and Final Thoughts
Use the DATE function as necessary, but not if the alternative is to simply type a date into a cell as a string.
Further, the DATE function can be used to combine the different parts of a date (year, month, day) that are located in separate cells. It’s also a great way to ensure the date is interpreted by the spreadsheet in a consistent manner regardless of someone’s personal Language & Region settings.
For more information on this specific function, visit the Apple Support guide for DATE.
Similar Functions That May Help:
Member discussion